Table of Contents
- Why Long-Term Grain Storage Matters for Your Pantry
- Best Containers for Grain Storage
- Grain Storage Temperature and Humidity Control
- How Long Do Whole Grains Last in Storage
- How to Prevent Pests in Stored Grains
- Step-by-Step Grain Preparation and Packing Workflow
- Organic-Specific Storage Considerations
- Frequently Asked Questions
Last Updated: October 10, 2026
Why Long-Term Grain Storage Matters for Your Pantry
Storing grains properly keeps them fresh for months or even years. Having a reliable pantry supply of organic grains gives you peace of mind and saves money. When you store organic grains long term, you protect your investment and ensure your family has access to nutritious staples whenever you need them.
The key is understanding what grains need to stay fresh. Whole grains contain natural oils that can break down over time. Air, moisture, heat, and pests all speed up this process. A well-planned storage system stops these problems before they start.
Long-term grain storage isn’t complicated, but it does require attention to a few critical factors:
- Temperature control keeps oils from breaking down
- Moisture management prevents mold and sprouting
- Airtight sealing blocks oxygen and pests
- Proper containers provide protection and organization
When you store organic grains long term with these basics in place, you’re building a pantry that works for you.
Best Containers for Grain Storage
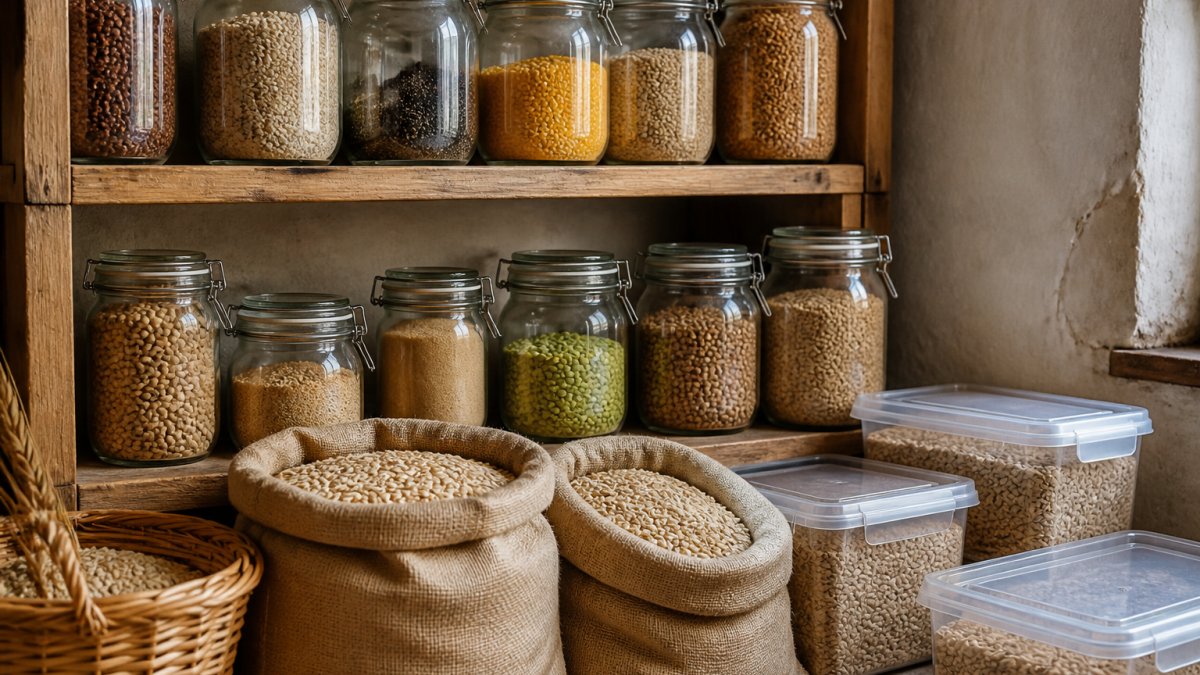
The right container makes all the difference. Your choice depends on how much grain you’re storing and how long you want to keep it.
Food-Grade Buckets and Sealed Plastic Containers
Food-grade buckets are the most popular choice for bulk grain storage. These five-gallon containers hold about 35 pounds of grain and stack easily. They protect grain from pests and moisture when sealed properly.
Look for buckets labeled “food-grade” explicitly. These are made from plastic that won’t leach chemicals into your grains. Regular plastic buckets can transfer harmful substances, so the food-grade designation matters.
Sealed plastic containers work well for smaller quantities. These are easier to handle than buckets and fit in cabinets or pantry shelves. The downside is that they cost more per volume than buckets.
Key advantages of food-grade containers:
- Stackable and space-efficient
- Opaque, which blocks light from degrading nutrients
- Durable enough to last many years
- Affordable for bulk storage
Glass Jars and Airtight Storage Bags
Glass jars offer a clear view of what you have. You can see when grain is running low without opening the container. They’re attractive enough to display on open shelving.
Glass works best for smaller quantities, grains you use regularly. A gallon-sized glass jar holds about 7 pounds of grain. Storing grain this way makes sense if you rotate through your supply every few months.
Airtight storage bags made from thick plastic work for medium-term storage. These bags take up less space than jars or buckets. However, they’re more vulnerable to punctures and don’t last as long as rigid containers.
Consider using glass or bags for grains you use frequently:
- Flour and meal (store in cool conditions)
- Rolled oats or other breakfast grains
- Specialty grains you use for specific recipes
- Grains you want to display in your kitchen
Grain Storage Temperature and Humidity Control
Temperature and moisture are the two biggest factors in how long grains stay fresh. Get these right, and your grains will last far longer.
Finding a Cool, Dry Storage Location
The ideal storage location stays cool and dry year-round. A basement, root cellar, or pantry away from the kitchen heat works best. Avoid areas near windows, exterior walls, or appliances that generate heat.
Grains stay freshest between 50°F and 70°F. If your home runs warmer, choose the coolest room available. Even a slight temperature drop extends shelf life significantly.
Moisture is the enemy of long-term storage. A dry location prevents mold, sprouting, and pest infestations. Basements can be humid, so check moisture levels before storing large quantities there.
Best storage locations in most homes:
- Cool basement corners away from furnaces
- Interior pantries without exterior walls
- Closets in climate-controlled areas
- Root cellars or similar cool spaces
- Garages in mild climates (avoid in hot or humid regions)
Avoid these locations:
- Kitchen cabinets near stoves or ovens
- Attics (temperature swings are extreme)
- Damp basements without dehumidification
- Garages in hot or humid climates
- Areas exposed to direct sunlight
Monitoring Moisture and Temperature
Check your storage area regularly. A simple thermometer tells you if temperature stays in the safe range. A humidity meter shows whether moisture levels are rising.
Grains should contain less than 10% moisture before storage. Higher moisture levels encourage mold growth and pest activity. If you’re buying grains from a reputable supplier, they’re already dried to safe levels. Store them in airtight containers to keep moisture out.
If you notice condensation inside your containers, the storage location is too humid. Move containers to a drier area or add desiccants to absorb excess moisture.
How Long Do Whole Grains Last in Storage
Shelf life depends on the grain type, storage temperature, and moisture levels. Properly stored grains last far longer than most people expect.
Shelf Life by Grain Type
Whole grains last 1-3 years when stored properly in cool, dry conditions. Some grains stay fresh longer than others.
Grains with higher oil content break down faster. Whole wheat berries last about 2-3 years. Rolled oats last 1-2 years because the processing exposes more oils to air. White rice lasts 4-5 years because it has less oil.
Milled grains and flours have shorter shelf lives. Whole grain flour lasts 3-6 months at room temperature. In a freezer, it lasts 1-2 years. Refined flour lasts longer because the oils have been removed.
Typical shelf life for common grains:
| Grain Type | Cool, Dry Storage | Freezer Storage |
|---|---|---|
| Whole wheat berries | 2-3 years | 5+ years |
| Rolled oats | 1-2 years | 3-4 years |
| Brown rice | 1-2 years | 3-4 years |
| White rice | 4-5 years | 5+ years |
| Whole grain flour | 3-6 months | 1-2 years |
| Cornmeal | 1 year | 2-3 years |
| Quinoa | 2-3 years | 4-5 years |
| Lentils and beans | 2-3 years | 5+ years |
Signs of Spoilage and Quality Decline
Check grains before using them. Off smells, visible mold, or insect damage mean the grain has spoiled.
Rancidity develops when oils oxidize. Rancid grains smell musty or unpleasant. They taste bitter or off. Throw out any grain with these signs, rancidity indicates spoilage has begun.
Mold growth appears as discoloration or white fuzzy patches. Moisture inside sealed containers causes mold. Discard moldy grains immediately.
Pest damage is obvious. You’ll see insect bodies, webbing, or holes in grains. If pests are present, the entire batch is compromised.
Warning signs that grain has declined:
- Musty or sour smell
- Visible mold or discoloration
- Insect damage or webbing
- Moisture beads inside the container
- Unusual taste or texture
- Clumping or hardening
How to Prevent Pests in Stored Grains
Insects are the biggest threat to stored grains. Prevention is far easier than dealing with an infestation.
Inspection and Preparation Before Storage
Inspect grains carefully before storing them. Look for insects, webbing, or damage. If you see any signs of pests, don’t store that grain.
Some insects lay eggs in grains at the supplier. These eggs hatch weeks later inside your containers. Freezing grains for 48 hours before storage kills eggs and pests. Place grains in a freezer-safe container for two days, then move to your long-term storage.
Clean containers thoroughly before filling them. Dust and debris can harbor pest eggs. Wash food-grade buckets with hot water and let them dry completely.
Preparation steps before storage:
- Inspect grains for visible damage or insects
- Freeze grains for 48 hours to kill pest eggs
- Wash containers with hot water and dry completely
- Wipe container interiors with a clean cloth
- Ensure containers are completely dry before filling
Using Oxygen Absorbers and Sealing Techniques
Oxygen absorbers remove air from sealed containers, killing any pests that survive freezing. These small packets contain iron powder that absorbs oxygen as it oxidizes.
Drop oxygen absorbers into your container before sealing. Use one 300cc absorber per five-gallon bucket. For smaller containers, use 100cc absorbers.
Heat sealing creates an airtight barrier that pests cannot penetrate. A heat sealer fuses plastic bags shut. This method works well for smaller quantities.
Vacuum sealing removes air and seals bags in one step. This works for smaller containers and portions. Vacuum-sealed bags take up less space than rigid containers.
Sealing methods for different container types:
- Five-gallon buckets: Gamma seal lids or food-grade lids with oxygen absorbers
- Plastic bags: Heat sealer or vacuum sealer
- Glass jars: Airtight lids or vacuum-seal attachments
- Smaller containers: Airtight snap lids
Store sealed containers in your cool, dry location. Check them occasionally for signs of pest activity. If you notice damage or moisture, reseal immediately.
Step-by-Step Grain Preparation and Packing Workflow
Follow this process to prepare and store grains correctly. Each step protects your grain investment.
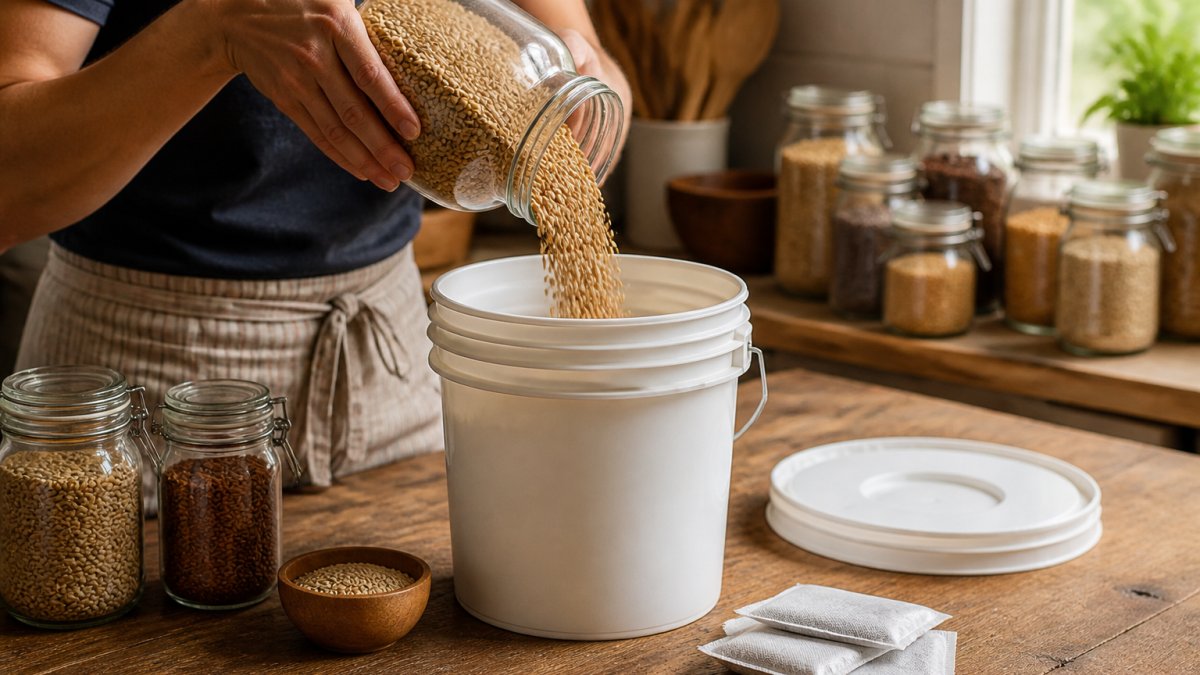
Step 1: Clean and Inspect Your Grains
Start by spreading grains on a clean surface. Look for debris, discolored grains, or insects. Remove anything that doesn’t look right.
Rinse grains if they feel dusty. Place them in a fine-mesh strainer and run cool water over them. Let excess water drain completely. Spread damp grains on a clean cloth to air-dry for several hours.
Once dry, grains are ready for the next step.
Step 2: Measure Moisture Content
Dry grains have less than 10% moisture. If you’re buying from a reputable supplier, moisture is already at safe levels.
To test moisture yourself, bite a grain. It should break cleanly without bending. If it bends, it contains too much moisture. Spread grains in a warm, dry location for another day or two.
You can also use a grain moisture meter for precise readings. These tools cost under $30 and give accurate results.
Step 3: Pack and Seal Your Containers
Place grains in clean, dry containers. Fill food-grade buckets to the top, leaving minimal air space. For plastic bags, fill and squeeze out excess air before sealing.
Add oxygen absorbers if using five-gallon buckets. Use one 300cc absorber per bucket. Seal immediately after adding absorbers.
For heat sealing, work quickly before oxygen absorbers lose effectiveness. For bucket lids, press down firmly to create a tight seal.
Step 4: Label and Monitor Storage
Label each container with the grain type and storage date. Include the best-by date based on expected shelf life.
Stack containers in your cool, dry storage location. Check them monthly for signs of moisture or pest activity. If condensation appears inside, move containers to a drier area.
Organic-Specific Storage Considerations
Organic grains require the same storage basics as conventional grains. However, organic certification adds one important consideration.
Organic grains cannot be treated with synthetic pesticides. This means they’re more vulnerable to pest infestations during storage.
Buy organic grains from trusted suppliers who follow proper handling and storage. Allstarhealth sources organic grains from certified producers.
Store organic grains with the same attention to temperature, moisture, and pest prevention as any other grain.
When purchasing organic grains, ask suppliers about their storage practices. Reputable organic suppliers maintain detailed records of how grains were handled before reaching you.
Building a pantry of stored organic grains gives your household food security and peace of mind.
Frequently Asked Questions
How long can you store organic grains if you use the right containers and conditions?
Whole grains stored in airtight containers with oxygen absorbers in a cool, dry place can last 10-30 years depending on the grain type. Whole grain berries like wheat and oats have longer shelf lives than milled flours or grain meals, which are more prone to oxidation and rancidity. Consistent temperature below 70°F and moisture levels below 10% are critical for achieving maximum storage duration.
What is the best container type for long-term grain storage?
Food-grade buckets with gasket lids and glass jars with airtight seals are the top choices for long-term storage. Five-gallon buckets work well for bulk quantities and protect from air exposure and outside moisture. For smaller amounts, vacuum-sealed food storage bags or sealed glass containers prevent oxidation effectively. Always verify containers are food-grade and free from previous chemical residue.
How do you know if stored grains have gone bad?
Inspect grains regularly for signs of spoilage: musty or rancid odor, visible mold, discoloration, or insect activity. Rancidity develops when grains are exposed to air and heat, affecting flavor and nutritional quality. If grains develop an off smell or taste, discard them. Proper storage in sealed containers and cool environments prevents most spoilage, but checking every 6-12 months ensures grain quality.
Do organic grains require different storage methods than conventional grains?
Organic grains follow the same storage principles as conventional grains: airtight containers, cool temperatures, low moisture, and pest prevention. However, organic grains may have stricter certification requirements regarding storage environment and handling to maintain organic status. Store organic grains separately from conventional products to prevent cross-contamination and preserve their organic certification integrity.